
Drill, Glue and Sanding Fixture
In order to bind the signatures together, I developed the multi-purpose fixture that you see described below.
Once you have assembled all of the signatures, place each chapter in the
correct order in between the jig plates as you see below. Make sure the
signatures are straight and even and raised above the fixture by about 1/8" and
then tighten the clamp bolts. You are now ready to apply glue to the signatures
at the spine end of the book.
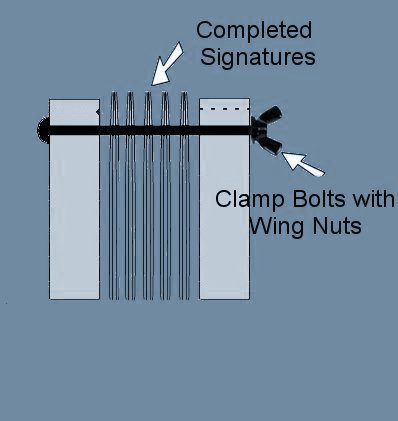
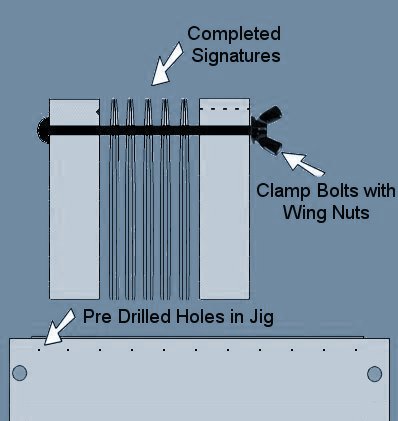
Once the glue has dried, loosen the clamps and move the signatures down flush
with the top of the fixture and then re-tighten the clamp bolts With the
signatures flush with the top of the fixture, you will be able to drill the
holes through all of the pages of your book at exactly the correct depth from
the back of the spine. Since these are very small holes that you are drilling,
you do not want to force the drill too hard as it will cause the drill bit to
bend and possibly break.
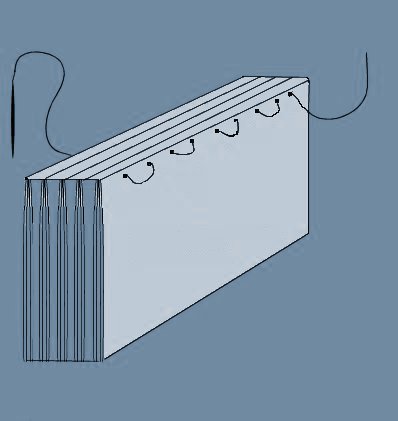
Once the holes are drilled, you are ready to sew the signatures. I have
experimented with several types of threads, each producing different results. I
first used a single heavy waxed nylon line for this purpose. The twine measured
.035 in diameter but soon found that this was too bulky and too strong to allow
the pages to open easily. I then tried a much finer thread pulling two strands
rather than just the one thinking that the pages would spread open more easily.
My last attempt was to use an single strand elastic type thread with a brand
name of (TCH Rite Stretch Rite). This seemed to work well allowing the pages to
lay open fully. This particular thread needs to be pulled somewhat tight but not
so tight as to remove all of the stretch. With each of the above types of thread
I sewed back and forth through the book from one end to the other as you see
below and then repeated the process in reverse until I reached the starting
point.
After trimming off the nylon twine ends, you can apply a 1/4" strip of glue
down the entire length of the twine on both sides and at the same time, apply
another layer of glue to the spine. Once the glue has dried, you can add another
1/4" strip of glue down the twine and add a blank half page to the front and
back to hide the twine. The book is now ready for the cover. The cover of course
is all one piece and needs to be the exact dimensions of of the front, back and
spine. This will necessitate that you use paper measuring 8-1/2 x 14". A
completed cover needs to be pre-folded to the exact book dimensions and can be
added rather easily by applying a layer of glue to the book spine and a layer
inside the cover along the spine area being careful not to get any glue spill
over onto the front or back.
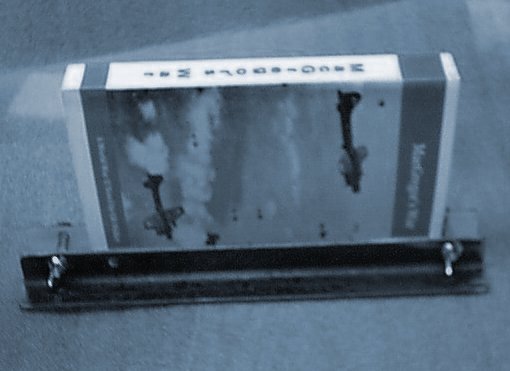
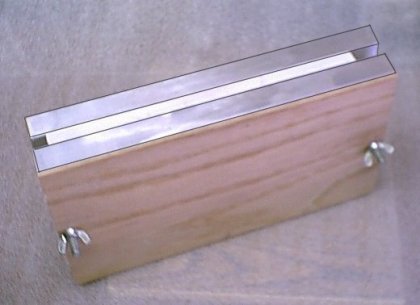
What you see below is a cover that has just been glued to the book and supported
in a metal angle jig for drying. You could just as well use a couple of large
books for this purpose. Even though this picture shows the spine end of the book
up, it is much better to place the spine end down against a flat surface as it
tends to wrinkle along the spine if it is allowed to dry out in the open.
Once the glue has dried, you are ready to trim the edges of the pages, top, front, and bottom. This fixture comes with metal angle plates that fit along the inside of the jig as indicated by the red angles. The reason for these plates is to prevent removal of material from the wooden jig when you begin the sanding process. With the rough uneven pages sticking slightly above the top of the jig, tighten the wing nuts and use and orbital sander to smooth the edges of the pages. This produces an almost satin like finish on the edge of the pages
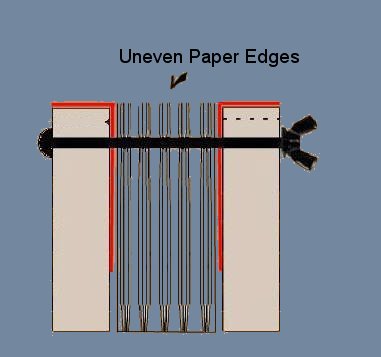
This is an actual picture of the jig ready to have the surface of the pages trimmed. If you would like to purchase this fixture, click on the image below for details.
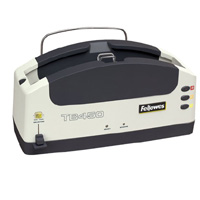
Another option is to purchase a thermal binder to apply the glue to the spine
of your books. Shown below is a
Fellows
TB-450 which is ideal if you plan on doing multiple books. I purchased one
of these and it is excellent for book binding without the use of thread. This
thermal binder has 3 settings for various book sizes and when combined with the
glue strips, you can create Custom Book Covers. It takes only a minute or less
to bind a book with this machine and it has a handy cooling rack on the back.
Using the Fellows Thermal Binder will require that you dump the signature method
in that each individual page will get glued to the spine. I ended up creating a
signature for each chapter but instead of folding it. I used a
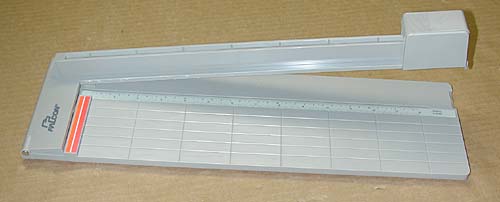
Falcon 500 cutter (see below) to slice the 8-1/2x11 sheets into single book
pages 5-1/2 x 8-1/2. With all of the pages stacked in their proper order, it's
very easy to insert them into a handy measuring guide on the front of the
thermal binder. This guide will display the width you need for your cover. This
thermal method of binding also requires much less sanding on the pages.
Fellows TB-450
The Falcon 500 cutter that you see below is excellent for slicing your
sheets. This cutter has a regular single edge razor blade in the cutting head.
The blade retracts for safety. The cutter is a bit flimsy when it stands alone
but I mounted it on a board to give it more stability and I must say, I have
abandoned my other old cutter with the arm that comes down and slices the paper.
When you are making books, you need the paper to be sliced clean and without
ripples and this cutter does just that. You can buy this cutter at
Amazon.com
Next, let's take a look at how to print a cover
for your book or magazine.